When it comes to protecting your roof and preventing water damage, understanding the concept of drip edge overlap is crucial. In this article, we’ll break down the importance of drip edge overlap, how to measure it, common mistakes to avoid, and why it matters for the longevity of your roof.
Understanding Drip Edge Overlap
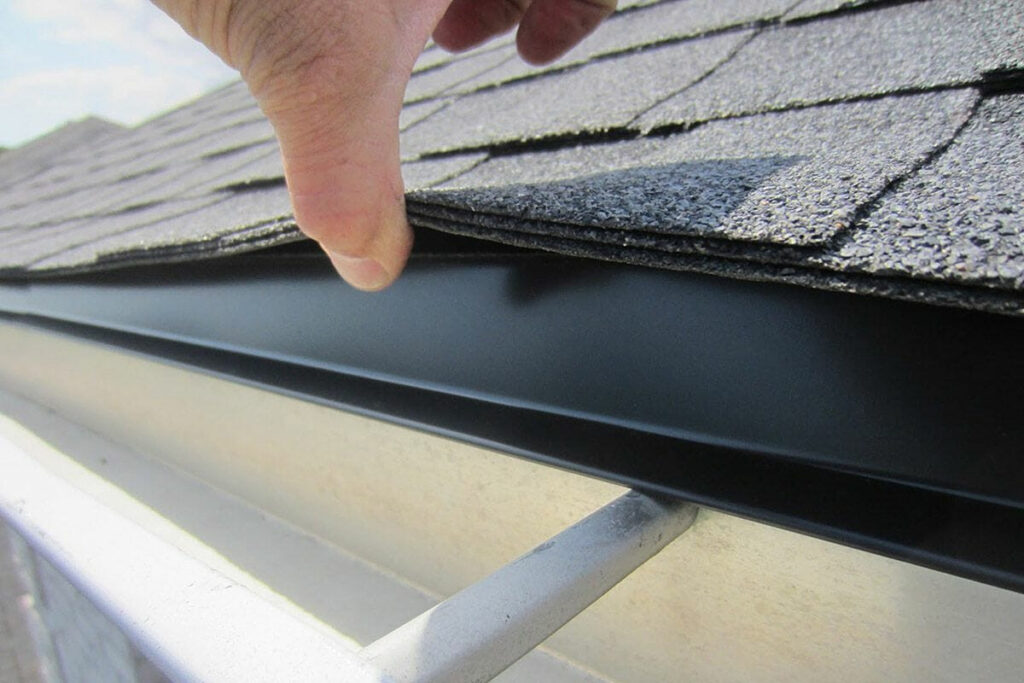
Before delving into drip edge overlap, let’s grasp the basics. The drip edge is a part of the roof designed to prevent water from seeping underneath the roof’s edge and roofing materials such as shingles. It’s typically made of metal and is installed along the edges of your roof, overhanging slightly.
The Purpose Of The Drip Edge
A drip edge serves a critical purpose. It directs water away from your roof’s fascia and into the gutters, keeping the underlying structure dry, and helping to prevent rot. However, it needs to have the right amount of overlap to function effectively.
Types Of Drip Edge Materials

Various materials are used for drip edges, including aluminum, galvanized steel, and PVC. Each has its advantages, but the overlap requirement remains consistent regardless of the material.
Aluminum: Lightweight and corrosion-resistant, an aluminum drip edge is a popular choice. It’s easy to work with and comes in various colors to match your roofing material.
Steel: A steel drip edge is incredibly sturdy and long-lasting. It’s an excellent option for areas prone to severe weather conditions.
Copper: While less common, copper drip edge adds a touch of elegance to your roof line. It’s highly resistant to corrosion and develops a beautiful patina over time.
Benefits of Adequate Overlap
Drip edge overlap might seem like a minor detail in a roof installation, but it offers several significant benefits that contribute to your roof’s overall protection and longevity. Here are the key advantages of properly overlapping drip edges:
1. Enhanced Water Protection
The primary purpose of drip edge overlap is to create a barrier that prevents water from infiltrating beneath your roofing materials. When drip edge sections overlap at least 2 inches, they form a continuous, watertight seal. This prevents rainwater from seeping under the roofing shingles or other materials, reducing the risk of water damage, rot, and mold growth within your roof’s structure.
2. Extends The Roof’s Lifespan
By effectively channeling water away from the vulnerable edges of your roof, drip edge overlap helps prolong the life of your roofing materials. When water doesn’t accumulate or seep into the roof deck, you reduce the risk of structural deterioration, which can significantly extend the lifespan of your roof.
3. Protects The Fascia And Soffit
Drip edge overlap also shields the fascia and soffit boards that are located along the roof’s edge. These components are susceptible to water damage if not adequately protected. Overlapping the drip edge ensures that water is directed away from these crucial elements, preventing rot and prolonging their lifespan.
4. Minimizes Ice Dam Formation
In colder climates, ice dams can form along roof edges, leading to water backup and potential leaks. A correctly overlapped drip edge helps mitigate ice dam formation by preventing water from seeping under the roofing materials. This can reduce the chance of ice dams and the associated damage they can cause.
A Guide To Perfecting Drip Edge Overlap
Getting the drip edge overlap right is crucial to effectiveness. This is where most folks make mistakes that can cost them in the long run. Luckily, we’ve got you covered!
Step 1: Materials and Tools
Before you start, make sure you have the right tools and materials at your fingertips. Here’s what you’ll need:
- A drip edge (of course!)
- Measuring tape
- Tin snips or utility knife
- Roofing cement
- Nails and a hammer
- Safety goggles
Step 2: Measure Twice, Cut Once
You’ve heard this before, right? Well, it applies here too. Measure the length of the roof’s edge where you plan to install the drip edge. Ensure you’re working with accurate measurements or otherwise, you’ll end up with an overlap that’s too short or too long – a costly mistake!
Step 3: Cut With Precision
Cut the drip edge to the desired length using your tin snips or utility knife. Remember, trimming it down later if it’s too long rather than cutting it too short from the get-go is best. Precision is key, folks!
Step 4: Install The Drip Edge

1. Measure And Cut The Drip Edge
Measure the length of the eaves and gable ends where you’ll install the drip edge. Cut the drip edge into appropriate lengths using tin snips or aviation shears, allowing for a 2-inch overlap at the corners.
2. Prepare The Roof
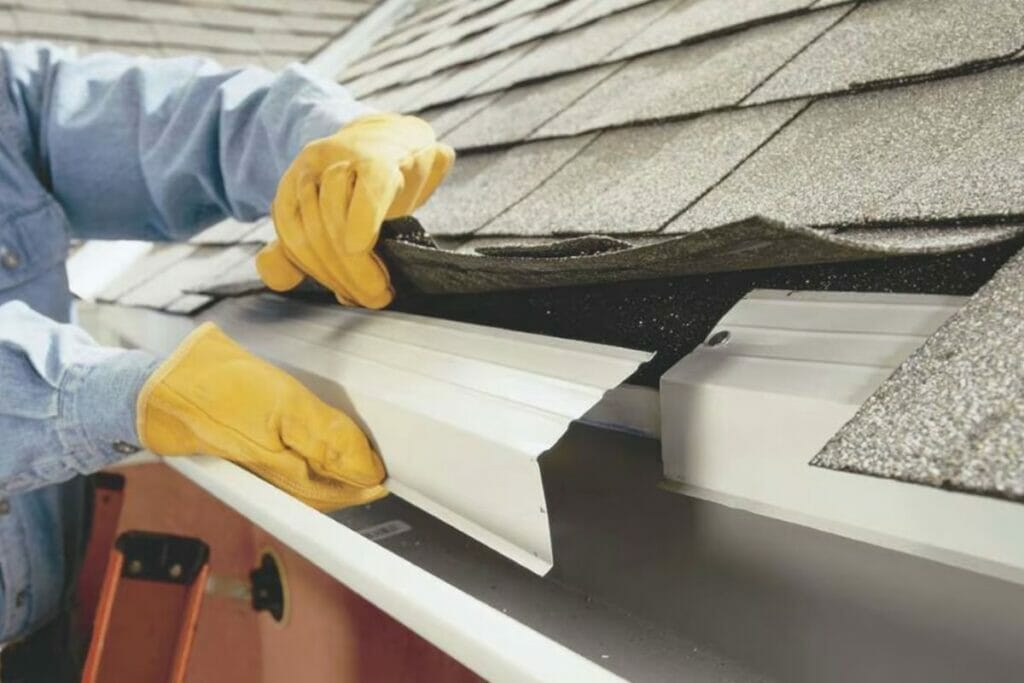
Inspect your roof for any existing damage or issues. This part may involve prying up some of the shingle, or other roofing material, in order to install part of the drip edge below the material.
Remove any debris, and make sure the area where you’ll install the drip edge is clean and dry.
Be careful that you’re not voiding any shingle warranties with this step, before going forward with the installation.
3. Install the Drip Edge Along the Eaves
Position the drip edge along the eaves, allowing it to overhang the edge slightly. Secure it in place using roofing nails or screws, spaced approximately 12-18 inches apart. Be sure to nail it into the roof deck, below the shingles.
4. Inspect And Seal
Inspect the entire length of the installed drip edge. Ensure it’s securely fastened and there are no gaps. Apply roofing sealant along the top edge to create a watertight seal.
Step 5: Ensure The Overlap Is Enough
After you have installed the first piece of drip edge flashing, it’s now time to overlap it. When placing the next piece of drip edge, ensure it overlaps the first piece by at least 2 inches. This overlap is your shield against water infiltration.
Secure the second piece in the same way, with nails and roofing cement.
Step 6: Corners and Edges
Cut the drip edge at a 45-degree angle for corners and edges and fold it over the edge. This creates a tight, water-tight seal. Nail it down securely, and you’re good to go!
Common Mistakes to Avoid
Unfortunately, many DIY enthusiasts and even some professionals make mistakes during drip edge installation. This includes inadequate overlap, improper alignment, and failure to seal joints correctly.
End Note
Since you have to loosen the shingles to install a drip edge on a pre-installed roof, it’s best to leave the entire process to the professionals. Improperly installing the drip edge can do more harm than good, and you may void the warranty on your shingles if you have one.
If you need to install or replace the drip edge on your roof, contact Clear Cut Xteriors in Minneapolis, MN, today at (651)-340-3410 and consult with one of our roofing professionals. With years of experience, we can help you protect your home from water damage.
FAQs: Your Burning Questions Answered
A.You can attempt to install a drip edge yourself, but experience is crucial for the process, so it’s best to hire a professional. By hiring a professional you reduce the chance of issues occurring, as well as voiding any warranties on your shingles.
A. An improper overlap can lead to water infiltration, which can cause costly damage over time. That’s why it’s crucial to get it right.
A. Yes, it’s a good practice to replace the drip edge when re-roofing. This ensures a proper seal and maximum protection.


